 Contact Us

Table of Contents

Contact Us
An oversized T-shirt fit is created in the pattern, not by sizing up. You set it by balancing five measurements — body width, shoulder drop, sleeve length, body length and collar — then choosing a fabric weight and drape that hold that silhouette and grading each size so the proportions stay the same.
Key takeaways
- Oversized is a proportion decision, not one larger base size: body width, shoulder drop, sleeve length, body length and collar are set as a group.
- Shoulder width and sleeve length are linked; widening the shoulder without adjusting the sleeve makes the sleeve read too long, according to Minghang Garments' comparison of drop shoulder and set-in sleeve.
- Fabric weight, thickness and drape change how the volume reads, so the silhouette should be judged in the final production fabric.
- Grading carries the same proportions across the size run, and a graded sample still needs its own fit check.
- No single “add X cm” number is universal; the right amount depends on base size, silhouette and fabric.
What Is an Oversized T-Shirt Fit?
An oversized T-shirt fit is a deliberate set of proportion choices — extra body width combined with controlled body length, a shoulder seam that sits beyond the natural shoulder point, and sleeves and collar scaled to match — rather than a shirt that is simply one size bigger.
Drop-shoulder construction places the shoulder seam beyond the wearer's natural shoulder point, and Minghang Garments notes it is commonly used for oversized or relaxed silhouettes. Because the seam moves outward, it changes where the sleeve hangs, so the shoulder drop should be decided before sleeve length is finalised.
This guide covers developing an oversized fit from a pattern. Making an existing oversized shirt smaller is a separate alteration task with its own steps and is not covered here.
Which Measurements Create an Oversized Fit?
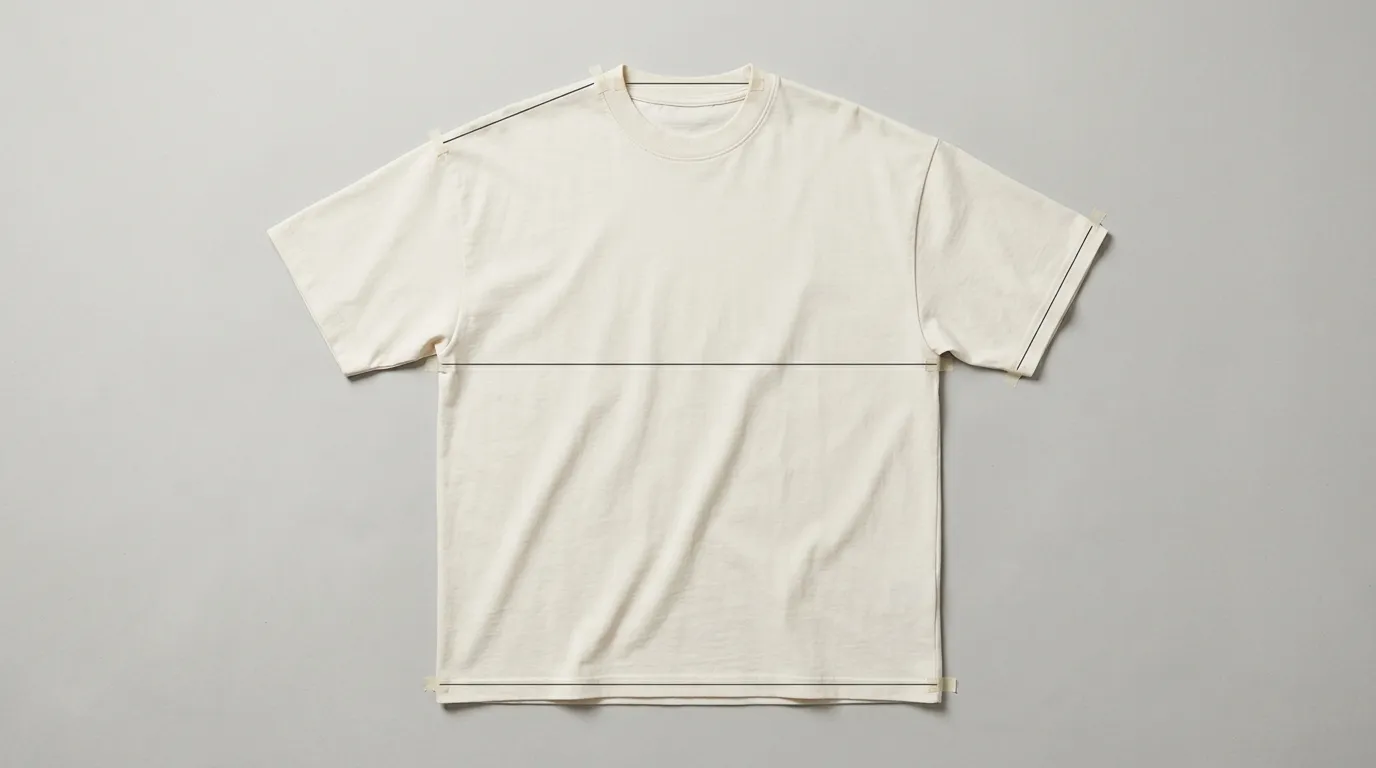
Five measurements control the silhouette: body width sets the volume, shoulder drop sets where the seam falls, sleeve length follows from the shoulder, body length keeps the volume from looking like a nightshirt, and the collar holds the neckline proportion.
| Measurement | What it changes visually | What to check on the sample | Dependency |
|---|---|---|---|
| Body width (chest, measured 1 in below the armhole) | Overall volume through the body | Flat width at the stated point, and how it reads on the model | Cannot be widened without reviewing body length |
| Shoulder seam position (shoulder drop) | Where the seam sits relative to the natural shoulder point | Seam position and whether the armhole still sits correctly | Sets sleeve length and sleeve hem position |
| Sleeve length and opening | How far the sleeve falls and how wide it reads | Sleeve length from the agreed start point plus opening width | Follows the shoulder drop decision |
| Body length (high point shoulder to hem) | Whether the shirt reads oversized or simply too long | Hem position on the intended fit model | Must move with body width, not against it |
| Collar and neck rib (opening and depth) | Whether the neckline looks proportionate to the wider body | Finished neck opening and rib depth in the final fabric | Scaled to the widened body, not the original block |
Measurement points should be listed in the specification with the base size and the agreed start points, so the sample can be checked against the same definitions.
Body Width and Body Length Must Move Together
Extra width without a controlled length reads as “too big” rather than oversized.
A fit guide published by Yosummer advises adding width without excessive length and keeping the hem around the hip; treat that as general editorial advice rather than a fixed measurement. An ordering guide from Quality Logo Products suggests 8–10 inches more than body circumference for an oversized fit, but it does not explain how that figure was measured or which pattern block it applies to, so it should be read as an example of a market figure, not a specification to copy.
Shoulder Drop Sets the Sleeve
Decide the shoulder position first, then adjust sleeve length and armhole so the sleeve hem lands where you want it.
Minghang Garments' guide on drop shoulder vs set-in sleeve states that shoulder width and sleeve length should be considered together, because increasing shoulder width without adjusting sleeve length makes the sleeves too long. That single dependency explains many oversized samples that look stretched rather than relaxed.
Collar and Neckline Proportion
Keep the neck opening and rib depth proportional to the wider body, because a collar scaled to the original narrow body looks undersized on the finished shirt.
Compare the finished neck opening and rib depth against the widened body on the same sample, in the final fabric, rather than judging the collar on its own.
How Do Fabric Weight and Drape Change the Silhouette?
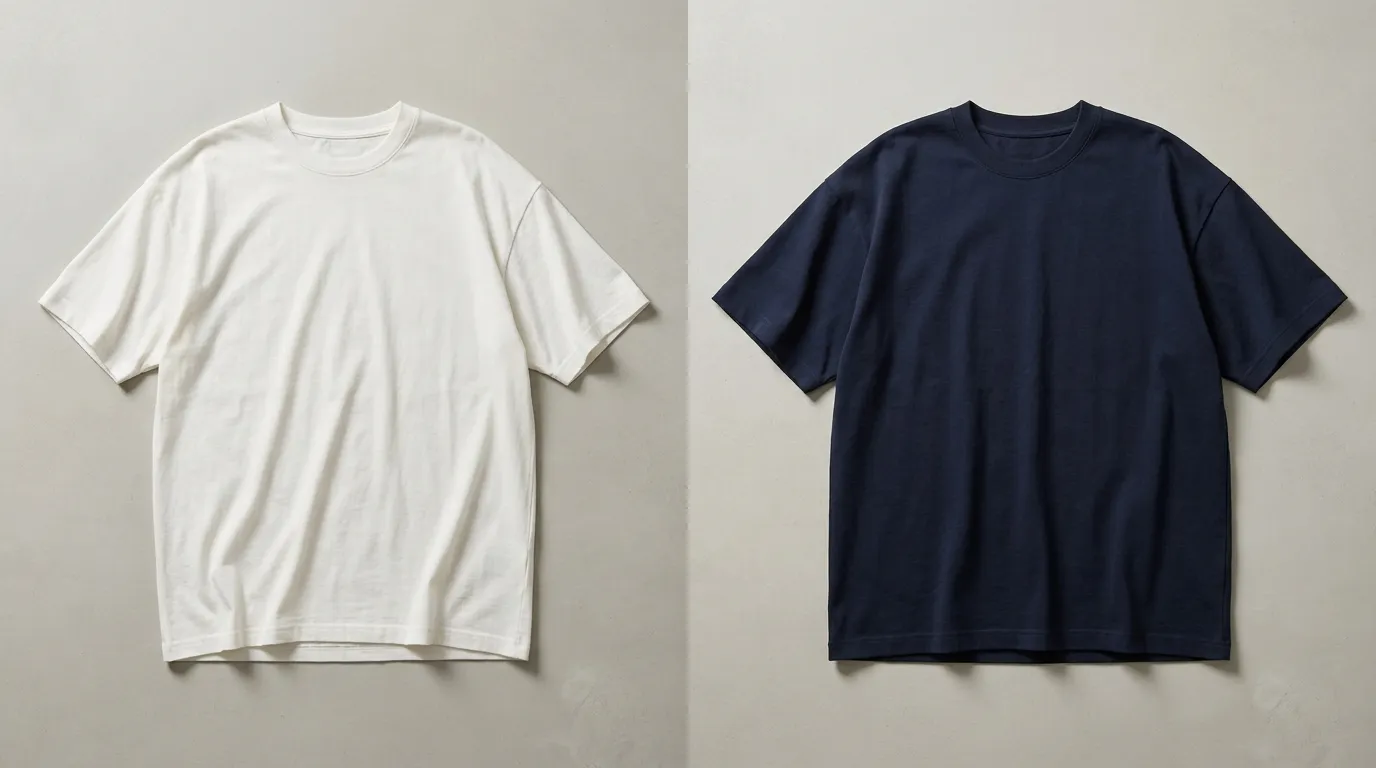
Fabric weight, thickness and drape change how shoulder construction and volume appear, so an oversized silhouette must be evaluated in the final production fabric rather than a substitute.
Minghang Garments' guide to pattern grading oversized clothing gives 260 GSM cotton jersey as an example for a softer oversized T-shirt and 320 GSM compact jersey for a boxier, more structured shape. Those are examples, not thresholds. The same guide describes 400–450 GSM fleece as adding weight; that range is written for fleece and does not establish a T-shirt specification. A Minghang Garments case page describes a 280 GSM cotton fabric giving an oversized T-shirt a more substantial structure, which is likewise a product example rather than a standard.
The practical decision rule is to choose fabric first for drape intent — soft and fluid versus structured and boxy — then re-verify shoulder drop and body width in that fabric. GSM alone does not predict how oversized a shirt looks.
How Do You Grade an Oversized Fit Across Sizes?
Grading carries the same intended proportions from the base size to the rest of the run, so the shirt still reads oversized at the smallest and largest size instead of becoming merely longer or wider.
Because no universal grade increments exist for oversized silhouettes, work through three decisions. First, lock the target proportions on the base size. Second, decide for each measurement point whether the increment follows the existing block or needs a custom adjustment because the silhouette is oversized. Third, approve a graded sample at each end of the run rather than assuming the proportions held.
The correct increments depend on the pattern block and cannot be given as one universal figure; Minghang Garments' grading guide covers grading oversized garments and the effect of fabric weight on silhouette, and it is the same source the fabric examples above come from.
What Should You Check on an Oversized T-Shirt Sample?
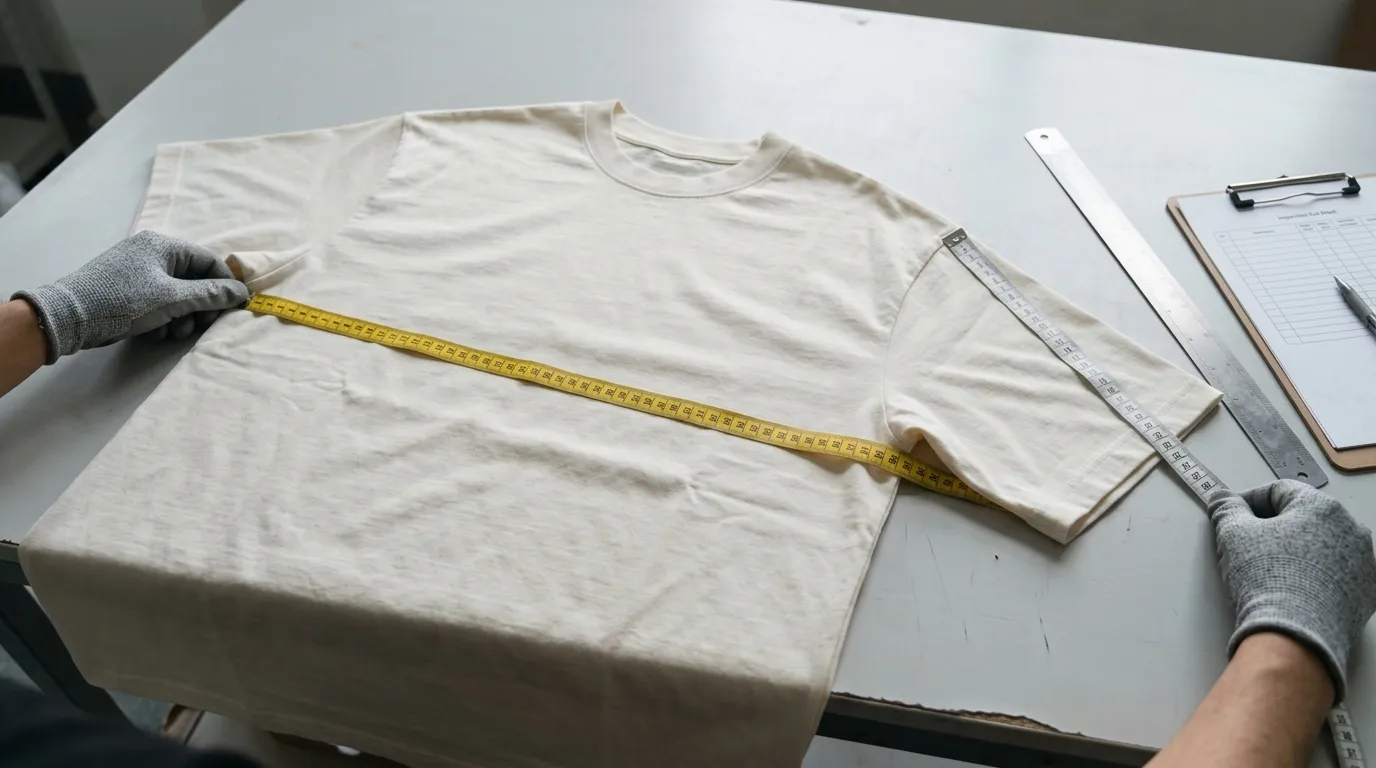
Measure the sample flat at every controlling point, put it on the intended fit model, and repeat the check in the production fabric before approving.
- Measure flat: body width, shoulder seam position, sleeve length, body length, neck opening and rib depth.
- Confirm the shoulder and sleeve relationship against the intended sleeve hem position.
- Run a wear trial on the intended fit model and record where the body hem and sleeve hem fall.
- Review the silhouette in the final production fabric, and correct grading or fabric choice before bulk.
- Re-check the measurements after washing where shrinkage is a concern.
SewGuide's alteration guide advises washing new cotton before cutting, because the fabric may shrink. That is alteration guidance, not a quantified shrinkage result, so no shrinkage percentage should be assumed from it. SewGuide's traced-shirt method and its 1/2-inch seam allowance belong to that alteration tutorial and are not part of a pattern-development check.
Common Oversized Fit Problems and How to Correct Them
Most oversized-fit problems are balance problems: sleeves that run long after a shoulder change, a shirt that looks long rather than wide, or a neckline that looks small against the wider body.
- Sleeves too long after a shoulder change — recheck the shoulder and sleeve together; the adjustment sequence is set out in “Shoulder Drop Sets the Sleeve”.
- Looks too big rather than oversized — reduce body length before reducing body width.
- Flat, shapeless volume — recheck fabric drape using the criteria in “How Do Fabric Weight and Drape Change the Silhouette?”.
- Neckline looks small — resize the neck opening and rib against the wider body.
- Collar standing away from the neck — check rib depth and neckline shape rather than collar width alone.
Frequently Asked Questions
How much bigger should an oversized T-shirt be than a regular fit?
There is no single universal figure. An ordering guide in this topic area suggests 8–10 inches above body circumference, but the correct amount depends on the base size, the intended silhouette and the fabric used. Set the amount on the pattern and confirm it on the sample instead of copying one number across styles.
Can you get an oversized fit by sizing up?
Sizing up usually adds length and shoulder width at the same time, so it rarely reproduces an intentional oversized silhouette. An oversized T-shirt fit is built by setting body width, shoulder drop, sleeve length, body length and collar as a group, then grading those proportions across the size run.
Does a higher GSM automatically make a T-shirt look more oversized?
No. Heavier or more compact fabric changes structure and drape, which changes how the volume reads, but the silhouette itself comes from the measurements. Minghang Garments gives 260 GSM and 320 GSM jerseys as examples of softer and boxier results, so the fabric and the pattern should be judged together in the final material.
Minghang Garments has manufactured custom clothing in Dongguan, China since 2017, covering pattern making, sampling and bulk production, with sampling of 7–15 working days and an MOQ from 100 pcs per color per style on stock fabric. Brands that want an oversized fit developed, graded and sampled can start with custom oversized t shirts.
-
Share
-

-

-