 Contact Us
Table of Contents

Contact Us
Updated 1 week ago
How to Prepare Design Files for Clothing Manufacturing

Minghang Garments
Minghang Garments is a custom apparel manufacturer specializing in activewear, streetwear and private-label clothing development. Our team supports brands through fabric sourcing, product development, sampling, bulk production and quality control, with OEM and ODM solutions for startups, growing labels and established apparel businesses.
Working with a clothing manufacturer becomes much easier when your product information is clear from the beginning.
That does not mean you need a perfect tech pack before making first contact.
Many apparel projects start with a sketch, reference image, existing garment, mood board, or basic design concept. What matters is giving the manufacturer enough information to understand what you want to develop and which details still need to be confirmed.
The more clearly your design, fit, fabric, branding, quantity, and timeline are communicated, the easier it becomes to estimate costs, recommend suitable materials, develop samples, and reduce unnecessary revisions.
In this guide, we will explain what information is useful to prepare before sending your clothing design to a manufacturer — whether you already have a complete tech pack or are still developing the idea.
Do You Need a Tech Pack Before Contacting a Clothing Manufacturer?
Not always.
A complete tech pack is one of the most useful documents for apparel development, but it is not the only way to begin working with a manufacturer. OEM and ODM clothing development
If you already have a tech pack, it can help communicate important details such as measurements, construction, fabric specifications, artwork placement, trims, labels, and packaging requirements.
However, many brands — especially startups and first-time founders — begin development before all of those details have been finalized.
A manufacturer may still be able to start from:
- Hand sketches or digital drawings
- Reference product images
- An existing garment sample
- Mood boards
- Fabric swatches
- Basic measurement requirements
- Logo or artwork files
- Notes describing the intended fit and product features
The key is to make it clear which parts of the reference should be followed and which parts you want to change.
For example, if you send a photo of an oversized hoodie, tell the manufacturer whether you are referencing the overall fit, hood shape, fabric appearance, wash effect, pocket construction, or only the general design direction.
This prevents the development team from making assumptions about details that were never intended to be copied.
A Tech Pack Helps Reduce Guesswork — It Does Not Replace Communication
Even a detailed tech pack may still require discussion.
Fabric behavior, construction feasibility, printing limitations, wash effects, trim availability, and production tolerances may need to be reviewed during development.
The purpose of a tech pack is therefore not simply to provide more documents.
It is to create a clearer shared reference between the brand and the manufacturer.
1. Start With a Clear Product Reference
A product reference gives the manufacturer a starting point for understanding what you want to develop.
This can be a hand sketch, digital drawing, reference photo, existing garment, competitor product, or a combination of several sources.
The important part is not simply sending the reference. You should also explain which details you want the manufacturer to follow.
For example, if you send a photo of a hoodie, the development team may need to know whether you are referring to:
- The overall silhouette
- Body and sleeve proportions
- Hood shape
- Pocket construction
- Fabric appearance
- Wash effect
- Rib structure
- Print or embroidery placement
- Color combination
- Specific construction details
A single reference image can contain many design elements, and not all of them may be relevant to your project.
If you only want to copy the fit but use a different fabric, say so clearly.
If you like the wash effect but want a completely different construction, mention that as well.
Avoid Using Reference Images Without Context
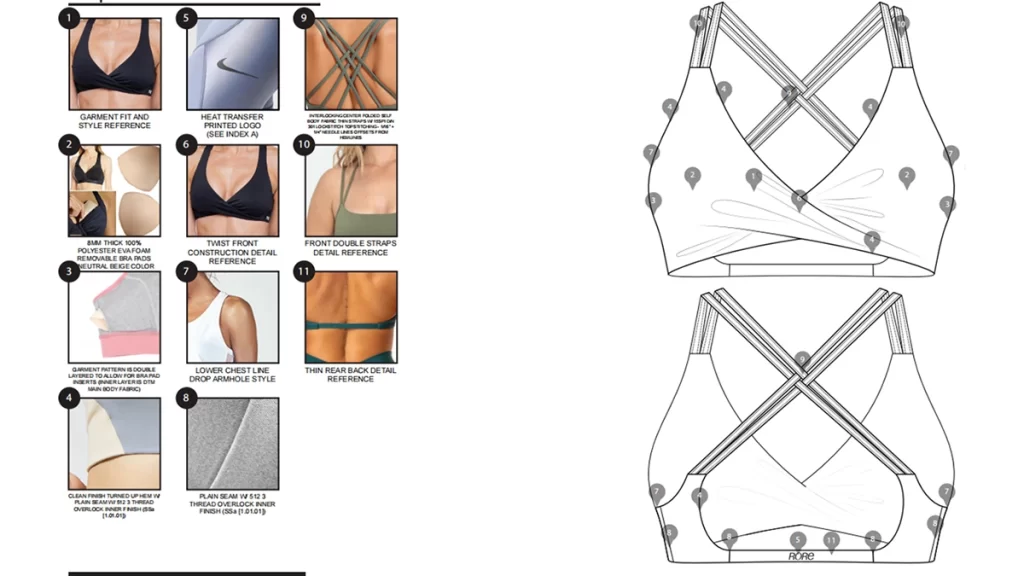
One of the easiest ways to create confusion during sampling is to send several reference images without explaining what each one represents.
For example, you may want:
- The fit from Image A
- The fabric texture from Image B
- The pocket construction from Image C
- The color from Image D
If this is not clearly explained, the manufacturer may combine the references differently from what you intended.
A simple note beside each image can prevent unnecessary sample revisions.
You do not need to create a complicated presentation. Even a PDF, PowerPoint, annotated image, or clearly organized message can work well if the information is easy to understand.
Existing Garments Can Be Useful References
If you already have a garment with the fit, construction, or fabric feel you want, sending a physical sample can be especially useful.
An existing garment allows the development team to check details that may be difficult to judge from photos alone, such as:
- Actual garment measurements
- Fabric thickness and hand feel
- Stretch and recovery
- Seam construction
- Rib tension
- Hardware quality
- Wash effect
- Overall garment weight
However, you should still explain which features should be followed and which ones should be changed for your own product.
2. Provide Measurements and Fit Information
Terms like “oversized,” “relaxed fit,” “slim fit,” or “compression fit” are useful for describing the general direction of a garment, but they are not precise enough for sample development on their own.
Different brands can interpret the same fit very differently.
For example, one brand may define an oversized T-shirt mainly by extra body width, while another may also want dropped shoulders, longer sleeves, a wider neckline, and a shorter body length.
This is why measurements are important.
If you already have a measurement chart, send it together with the design files. At minimum, it helps to identify the sample size and the key points of measurement that matter most to the style.
Depending on the garment, useful measurements may include:
- Chest or bust width
- Body length
- Shoulder width
- Sleeve length
- Waist
- Hip
- Inseam
- Front and back rise
- Leg opening
- Neck opening
- Hood dimensions
- Waistband height
Not every garment requires the same measurement points. A hoodie, sports bra, leggings, and oversized T-shirt will each need a different set of specifications.
If You Do Not Have a Complete Size Chart
You can still begin development.
One practical option is to provide an existing garment that fits the way you want and explain any changes you would like to make.
For example:
“Use this hoodie as the fit reference, but make the body 3 cm shorter and increase the sleeve width slightly.”
This gives the pattern team a much clearer starting point than simply asking for an “oversized fit.”
Reference measurements from an existing garment can also be combined with photos, sketches, or body measurements to create the first sample.
Fit Should Be Evaluated on the Actual Garment
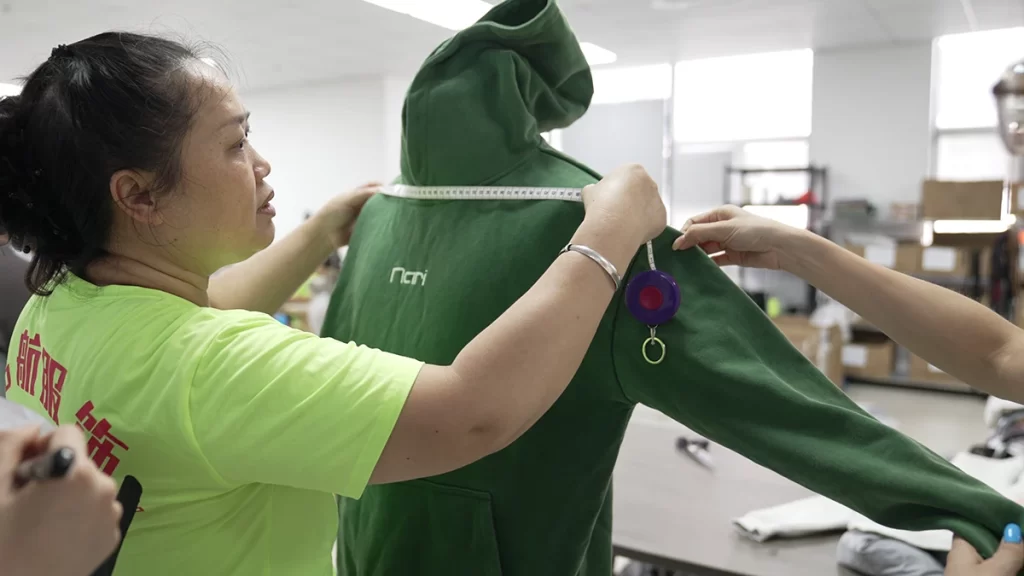
Measurements are important, but numbers alone do not always tell the full story.
Fabric stretch, weight, drape, rib tension, seam placement, and garment construction can all affect how a product fits when worn.
For example, two leggings with identical flat measurements may feel very different if one fabric has stronger compression or better recovery.
Similarly, a heavyweight oversized T-shirt may appear more structured than a lighter fabric even when the garment measurements are almost the same.
For this reason, fit should be reviewed together with the fabric and construction during the sampling stage.
Plan for Size Grading Before Bulk Production
Once the sample size is approved, the measurements usually need to be graded into the remaining sizes.
Size grading is not simply adding the same amount to every measurement.
Different areas of the garment may require different grading rules to maintain the intended fit and proportions across the full size range.
This is particularly important for fitted activewear, plus-size products, oversized silhouettes, and styles with unusual proportions.
Clear grading rules help ensure that the design works consistently across all planned sizes before bulk production begins.
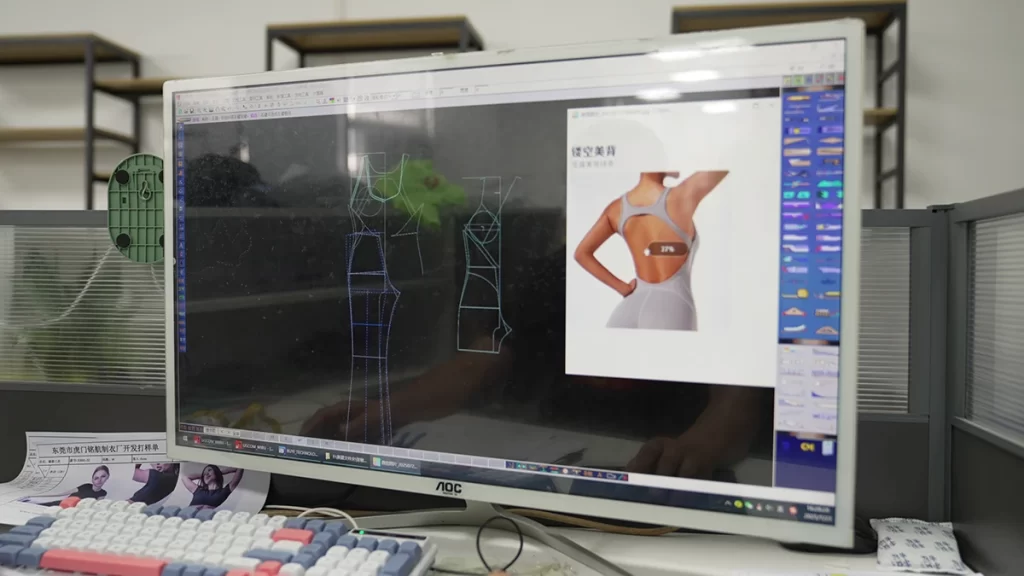
3. Specify Fabric Requirements
Fabric is one of the most important parts of apparel development, but it is also one of the easiest areas to describe too vaguely. fabric selection for custom apparel
For example, saying “I want 100% cotton” or “I want nylon spandex” gives the manufacturer a starting point, but it does not fully define the material you need.
Two fabrics with the same composition can still perform very differently depending on their weight, knitting structure, yarn quality, finishing, stretch, recovery, and intended use.
A more useful fabric specification may include:
- Fiber composition
- GSM or fabric weight
- Knitted or woven structure
- Stretch direction
- Stretch and recovery
- Hand feel
- Surface texture
- Thickness
- Shrinkage requirements
- Colorfastness requirements
- Pilling resistance
- Moisture management or other performance needs
- Wash, dye, or finishing requirements
The level of detail needed depends on the product.
A heavyweight streetwear hoodie may require attention to fabric weight, structure, shrinkage, and wash performance, while leggings may require stronger focus on stretch recovery, opacity, compression, and moisture management.
Composition Alone Does Not Define the Fabric
One of the most common misunderstandings in apparel sourcing is assuming that fabric composition tells you exactly how the garment will feel.
It does not.
A 100% cotton jersey can be lightweight and soft, while another 100% cotton fabric can be heavy, structured, and compact.
The same applies to synthetic fabrics.
Two nylon-spandex fabrics may have similar fiber percentages but very different compression, sheen, stretch, recovery, and hand feel.
For this reason, it is usually better to describe both the material composition and the performance or aesthetic result you want.
Instead of saying:
“I need 100% cotton.”
You can say:
“I am looking for a structured heavyweight cotton fabric around 300–350 GSM for an oversized T-shirt, with a dry hand feel and minimal shrinkage after washing.”
That gives the manufacturer much more useful information.
Use Physical Swatches or Reference Garments When Possible
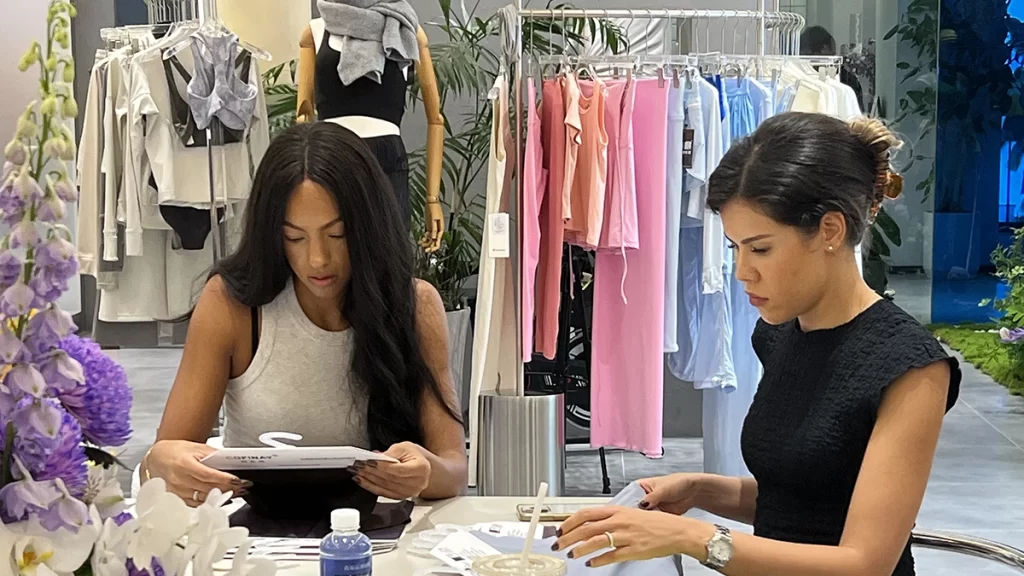
If you already have a fabric you like, sending a physical swatch or reference garment can be extremely helpful.
It allows the manufacturer to evaluate properties that are difficult to communicate through photos, such as:
- Actual hand feel
- Thickness
- Stretch
- Recovery
- Drape
- Surface texture
- Weight
- Finishing
The development team can then search for a similar available fabric or determine whether a custom fabric needs to be developed.
Physical references are particularly useful when terms such as “soft,” “premium,” “heavyweight,” or “buttery” are being used, because these descriptions are subjective.
Confirm Fabric Before Bulk Production
The fabric used for the approved sample should be clearly documented before bulk production begins.
If the bulk fabric is different from the sample fabric, even small differences in weight, stretch, shrinkage, or finishing can affect the final fit and appearance.
For this reason, fabric approval should be treated as part of product approval rather than as a separate sourcing decision.
4. Prepare Artwork in the Right Format
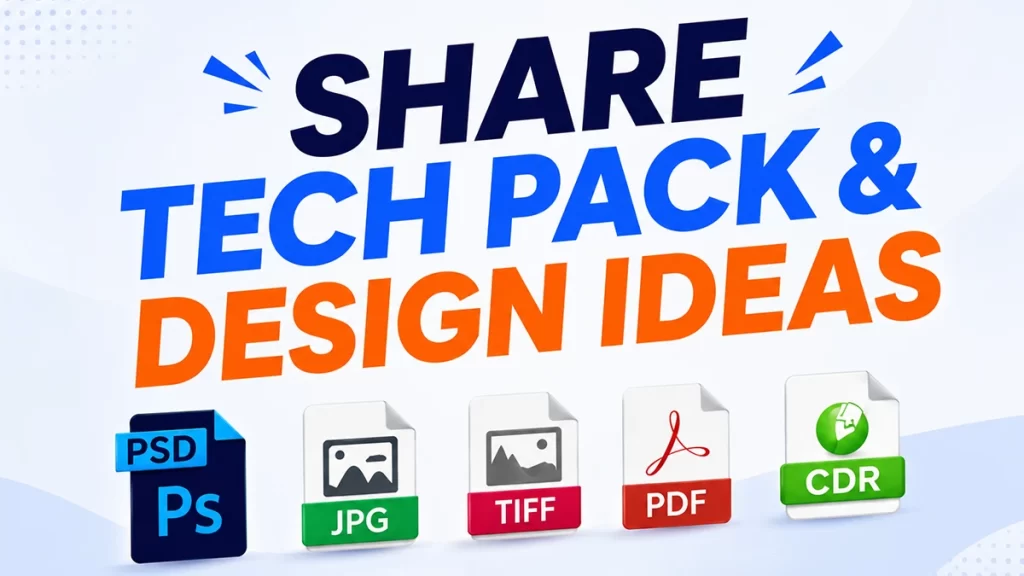
Artwork files are an important part of clothing development because they affect how accurately logos, graphics, prints, embroidery, and labels can be reproduced.
A screenshot or low-resolution image may be enough to explain the idea, but it is usually not suitable for final production.
Whenever possible, provide original artwork files in a format that can be edited or scaled without losing quality.
Commonly accepted formats include:
- AI
- EPS
- SVG
- Editable PDF
- High-resolution PNG
- High-resolution PSD when applicable
For logos and graphic prints, vector files are usually preferred because they can be resized without becoming blurry or pixelated. custom logo techniques
Vector Files Are Usually Better for Logos and Prints
A vector file is made from paths rather than fixed pixels.
This means the artwork can be enlarged or reduced while keeping clean edges.
Formats such as AI, EPS, SVG, and some PDF files are commonly used for:
- Screen printing
- Heat transfer
- DTF printing
- Silicone printing
- Puff printing
- Labels
- Hangtags
- Packaging artwork
For embroidery, the original vector artwork is also useful, although the design normally needs to be converted into an embroidery file during production preparation.
If you only have a PNG or JPG, provide the highest-resolution version available and avoid sending compressed screenshots from social media or messaging apps.
Clearly Define Artwork Size and Placement
Sending the logo file alone does not tell the manufacturer how the artwork should appear on the garment.
For each decoration, specify details such as:
- Artwork size
- Placement
- Distance from seams or neckline
- Print or embroidery technique
- Color
- Orientation
- Whether the placement changes by size
Instead of writing:
“Put the logo on the chest.”
A clearer instruction would be:
“Front chest logo, 8 cm wide, centered 7 cm below the high point shoulder, screen printed in off-white.”
This gives the sample team a measurable reference and reduces the risk of placement differences.
Check Whether the Artwork Is Suitable for the Selected Technique
Not every artwork works equally well with every decoration method.
For example, very fine lines may be difficult to reproduce in embroidery, while large solid embroidery areas can make lightweight fabric stiff or distorted.
Similarly, highly detailed photographic graphics may be better suited to DTG or DTF than traditional screen printing.
Before sampling, the manufacturer should review:
- Line thickness
- Artwork complexity
- Number of colors
- Print area
- Fabric type
- Stretch requirements
- Surface texture
- Wash or durability expectations
If necessary, small artwork adjustments can be made before production to improve the final result.
5. Include Labels, Trims and Packaging Details
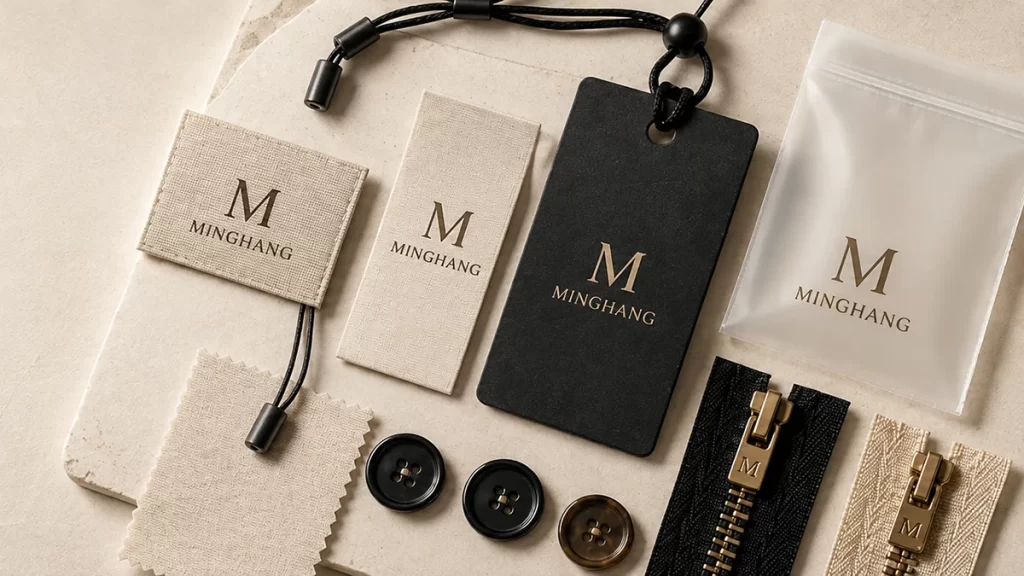
Branding and finishing details are easy to leave until the end of development, but they can affect both sampling and production planning.
If your garment requires custom labels, trims, hardware, or packaging, it is better to define these requirements early rather than adding them after the sample has already been developed.
Depending on the product, you may need to provide information for:
- Main labels
- Size labels
- Care or washing labels
- Hangtags
- Zippers
- Drawcords
- Eyelets
- Buttons or snaps
- Elastic
- Branded tapes
- Custom packaging
- Polybags
- Stickers
- Carton or shipping marks
Each item may have its own artwork, material, size, color, MOQ, and lead time.
Prepare Label Artwork and Content Clearly
For custom labels, the manufacturer usually needs both the artwork and the required content.
A main label may include the brand logo, while a care label can contain:
- Fiber composition
- Washing instructions
- Size
- Country of origin
- Manufacturer or brand information
- Required care symbols
Before production, make sure the wording, sizing, and placement are confirmed.
Even small errors in a care label can affect an entire production order if the labels have already been produced in bulk.
Trims Should Match the Garment Function and Design
Trims are not only decorative.
They can affect durability, comfort, appearance, and cost.
For example, when selecting a zipper, brands may need to consider:
- Zipper type
- Size
- Tape color
- Slider shape
- Puller design
- Metal or plastic finish
- Branded or standard hardware
The same applies to drawcords, eyelets, buttons, elastic, and other components.
If you have a specific trim reference, provide a photo, physical sample, supplier specification, or clear description.
If you do not have one, the manufacturer can usually recommend available options based on the product design and target price.
Packaging Requirements Should Be Confirmed Before Bulk Production
Packaging is often treated as a final step, but custom packaging may require additional development time and MOQ.
If you need branded packaging, specify details such as:
- Polybag type and size
- Printed logo
- Warning text
- Barcode stickers
- Size stickers
- Tissue paper
- Custom boxes
- Mailing bags
- Hangtag attachment
- Folding method
- Carton markings
Confirming these details before bulk production helps avoid delays when garments are ready to pack. Custom Garment Accessories
Product design is only one part of manufacturing planning.
Order quantity, target price, and launch schedule can all influence how a garment should be developed.
For example, a fabric or trim that works well for a 1,000-piece order may not be practical for a 100-piece trial order because of minimum order requirements. clothing manufacturer MOQ
Likewise, a highly customized construction may be technically possible but may not fit the target budget or launch timeline.
Providing this commercial information early helps the manufacturer recommend options that are realistic for your project.
Instead of only saying:
“I want 500 pieces.”
It is more useful to explain how that quantity is divided.
For example:
“500 pieces total: 250 black and 250 grey, sizes S–XL.”
Or:
“Two styles, 300 pieces per style, with two colors for each style.”
This helps the manufacturer evaluate:
- Fabric MOQ
- Dyeing requirements
- Trim MOQ
- Printing setup
- Size breakdown
- Production efficiency
- Estimated unit cost
Quantity planning becomes especially important when custom-developed fabrics, custom colors, or specialized trims are involved.
Should You Tell the Manufacturer Your Target Price?
If you already have a realistic target price, sharing it can be useful. custom clothing manufacturing cost
A target price gives the development team a better understanding of the commercial level of the product you are trying to build.
For example, if your target cost is relatively limited, the manufacturer may recommend:
- Available stock fabrics
- Standard trims
- Simpler construction
- Fewer decoration processes
- Alternative packaging
If the product is positioned at a higher price point, there may be more room for custom fabric development, specialty washes, premium trims, or complex branding.
A target price should not be treated as a demand for the factory to meet an unrealistic number.
It is better used as a reference for making development decisions.
Include Your Target Launch Date
If you are working toward a collection launch, exhibition, campaign, or seasonal selling period, share that date as early as possible.
The manufacturer can then work backward from the required delivery date and evaluate whether the project schedule is realistic.
A typical development timeline may include:
- Design review
- Fabric sourcing
- Sample development
- Sample revisions
- Final approval
- Material preparation
- Bulk production
- Quality inspection
- Packaging
- Shipping
Custom fabrics, washes, trims, or multiple rounds of sample revisions can extend the development timeline.
For this reason, the launch date should be considered from the beginning rather than after the sample has already been approved.
What If You Don’t Have Complete Design Files?
You can still begin product development even if your design files are incomplete.
Many clothing projects start before the brand has a finished tech pack, final measurements, confirmed fabric specifications, or production-ready artwork.
What matters is providing the information you already have and clearly identifying which parts of the product still need development.
You may be able to start with:
- Reference images
- Hand sketches
- Mood boards
- An existing garment
- Basic measurements
- Fabric swatches
- Logo files
- Notes describing fit, color, construction, or branding preferences
From there, the manufacturer can help identify what additional information is needed before the first sample is made.
Start With the Most Important Product Decisions
If your design is still at an early stage, focus first on the decisions that have the biggest impact on development.
These usually include:
- Product type
- Intended fit
- Fabric direction
- Main design features
- Branding method
- Approximate quantity
- Target price range
- Launch timeline
Other details can often be refined during sampling.
For example, you may already know that you want an oversized 400 GSM washed hoodie with embroidery and custom labels, even if you have not yet finalized the exact measurements or trim specifications.
That is already enough information to begin a meaningful development discussion.
A Manufacturer Can Help Turn References Into Production Specifications
A good development team should not simply wait for the brand to provide every technical detail.
They should also be able to review the concept, identify missing information, recommend suitable materials and construction, and help convert the design into a production-ready specification.
This can include:
- Fabric recommendations
- Pattern development
- Measurement suggestions
- Construction review
- Decoration recommendations
- Trim sourcing
- Sample development
- Size grading
- Production planning
The goal is to gradually replace assumptions with confirmed specifications before bulk production begins.
Final Checklist Before Sending Your Design to a Manufacturer
Before contacting a clothing manufacturer, it helps to organize the most important product information in one place.
You do not need to have every detail finalized, but the following checklist can make the first development discussion much more efficient:
- Product sketch, reference image, or existing garment
- Intended fit and silhouette
- Sample size and available measurements
- Fabric composition or performance requirements
- Preferred GSM or fabric weight
- Color requirements
- Logo and artwork files
- Print, embroidery, or decoration method
- Label and trim requirements
- Packaging requirements
- Estimated quantity per style and color
- Size range
- Target price, if available
- Target launch or delivery date
- Any special quality or testing requirements
If some of these details are still unknown, mark them as open items rather than guessing.
This makes it easier for the manufacturer to understand where technical support is needed and which decisions should be made during sampling.
Keep One Clear Approved Version
As development progresses, try to keep one updated version of the product specifications.
Repeatedly sending different measurements, artwork files, or reference images through separate messages can easily create confusion.
Once a detail is confirmed, update the main tech pack, development sheet, or approval document so that both the brand and manufacturer are working from the same information.
This becomes especially important before bulk production.
Final Thoughts
Preparing design files for clothing manufacturing is not about creating as many documents as possible.
It is about giving the manufacturer enough clear information to understand the product, reduce assumptions, and make better development decisions.
A complete tech pack is helpful, but brands can also begin with reference images, sketches, existing garments, fabric swatches, and basic product requirements.
As the project develops, those references should gradually become confirmed specifications covering fit, fabric, artwork, trims, packaging, quantity, and production requirements.
Clear information at the beginning usually leads to more accurate sampling, more reliable quotations, and a smoother transition into bulk production.
Written by
Minghang Garments
Apparel Manufacturing Team
Minghang Garments is a custom apparel manufacturer specializing in activewear, streetwear and private-label clothing development. Our team supports brands through fabric sourcing, product development, sampling, bulk production and quality control, with OEM and ODM solutions for startups, growing labels and established apparel businesses.
-
Share
-

-

-